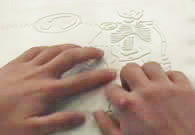
Tactile Graphics on the Fly
The key to being prepared to quickly produce graphics for a student is to have your tactile toolbox handy, filled with many textures, already sticky, and ready to be put on a graphic. You'll also need tools to make other textures, pre-made outline graphics (blank maps, clock faces, thermometers, grids for graphs, etc.) Take an afternoon every so often to replenish your supply so you can quickly produce a graphic. The list of suggested supplies and resources below will help you get started thinking "tactile". A trip to the hardware store will never again be the same!
Craft and Sewing Supply Stores
Many adhesive-backed supplies are available:
- foamy sheets and shapes in all sizes
- protective bumpers (cork, felt, vinyl)
- Velcro-type spots (circles and squares, two surfaces have very different textures)
- sheets of fabric or textured paper
- art/graphing tape in various widths
Other supplies that can be easily made sticky or will easily attach to paper:
- fabric such as corduroy (different wales), heavy woven upholstery, dotted swiss, Handiwipes
- decorative trim for clothing
- grosgrain ribbon (various widths) for bar graphs
- needlepoint, cross stitch and rug hooking fabrics
- snaps and grommets, various sizes
- brads and other embellishments
- heavy-weight thread "sewn" onto paper with a needle
- pre-cut balsa wood shapes
- corrugated paper found in light bulb packaging
- embossed coffee cup sleeves
Hardware Stores
Find adhesive-backed supplies:
- drywall tape (mesh texture)
- protective bumpers in a variety of textures
- electrical tape in various colors and widths
- sandpaper for wood and auto finishes
Other Equipment
The growth in the art of scrapbooking and all the supplies that are available for producing fabulous pages, cards, and posters has been quite a gift to tactile graphics.
- The containers for scrapbook pages are 12x12"- braille paper fits in them!
- Sheets of textured paper are available to represent areas.
- There are many doo-dads that make great point symbols.
- Archival quality glues are now more available.
- And most importantly, the Xyron Sticker Maker was created.
Your motto should be "ALREADY STICKY RULES!"
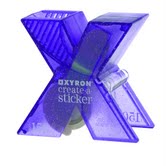
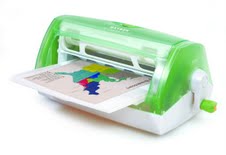
Xyron Sticker Makers
This little machine is an enormous time saver. They are available in a number of sizes at craft supply stores and on line. Xyron products enable you to very quickly make almost anything sticky and ready to adhere to that on-the-spot graphic . The machines come in a variety of width capabilities Xyrons are a little expensive, as are the refill cartridges, but do you have time to wait for the glue to dry? Your time is valuable. Make the investment. A bonus: students can use them to make things sticky for graphics they produce.
 |
 |
 |
 |
http://www.stickermaker.com/xyron900new.html
Tips:
- Use permanent adhesive cartridges for secure attachment. If you want to be able to move the texture or label, use the repositionable cartridge that works similar to a sticky note.
- Maximize use of the film in the cartridge. Prepare several items side-by-side to use the full width of the film.
- Select a texture (textured paper, paper towel, fabric) and Xyron a full sheet at a time. Cut out the portion you need for the current graphic, and put the rest aside for the next one.
- Set up hanging files for textures by category-quiet textures, bold textures, medium textures, lines, etc.
- Xyron textures onto different surfaces for variation in height. Use braille paper or card stock, and several weights of cardboard.
Sticky Strips for Lines
Using the Xyron and a paper cutter, make various widths of lines to be used for collage- bar graphs, x-y axes, curves, clock hands, etc.
- Xyron sheets of cardboard from cereal boxes and other standard packaging. Sticky side should be the cardboard surface, not the outside of the box, which is shiny.
- If desired, use standard construction paper or colored copy paper Xyroned to the outside of the box (shiny side). This is important if the reader will use the original copy of the graphic and color is important. It is not necessary if you are thermoforming the master.
- Using a paper cutter, slice very narrow strips evenly. Gently shape the strips into curves as needed.
- Cut wider strips for bar graphs.
Using the Xyron and gros-grain or satin ribbon, feed through to make sticky bars for graphs.
** I learned these techniques from Tami Lenhoff, an experienced math transcriber and former chair of NBA's Tactile Graphics committee.
Glues
Water-based glues, such as Elmer's or other school glues may soak into the braille paper surface and wrinkle the base or braille labels. They also take longer to dry .Use glues that have a silicone base and dry faster. Adhesives made for scrapbooking are usually not water based and are long lasting.
MonoAqua, by Tombo, is an excellent choice. It has two tips- one for fine lines and one for a broader area. Try other similar products to see what works for you.
If you are using metal point symbols, use a jewelry glue with a very fine point so you do not have excess glue around the symbol, distorting its shape.